|
|
 Michigan Avenue Bridge
 |


|
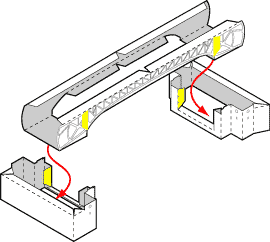
To start the model, cut out the ends of the bridge, score and fold the tabs and walls. Glue the walls together as shown in upper diagram.
Note that one of the ends of the bridge is slightly different from the other, in that one of its side walls is at a different angle as shown in lower diagram. This will be important to remember when you add the roadway to the top of the bridge. |
|
 |
Score the central part of the bridge and cut out the blank area in the middle.
Fold the tabs and bridge sides as shown. |
|
 |
Carefully insert the central part the bridge inside the walls.
The ends of the central section should tuck under the tabs on the outer walls of the bridge, so that the central section sits flat on the table. Glue the inside tabs of the wall pieces to hold the bridge together. Be sure that all pieces meet at right angles and that the model sits flat on the table. |
 |
 |
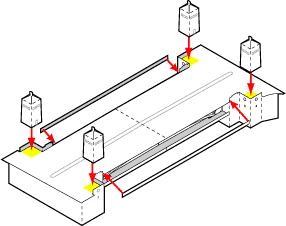
Next, cut out the tiny gatehouses. Before you glue the tabs inside, write the letter of each house on the inside of the piece to remember it.
Assemble the gate houses, fold in the roofs and glue the two sides of the tiny urn to complete the rooftop. Add a small wad of tissue paper inside the gatehouse to help glue the roof sections, as described in Tips & Techniques. |
|

|
Put the gatehouses in their lettered places, so that the corner seam of the gatehouse matches the corner where its letter is printed. All the doors to the gatehouses should face the street.
Finally, add the railings for the upper deck of the bridge so that no tourists fall into the river. |
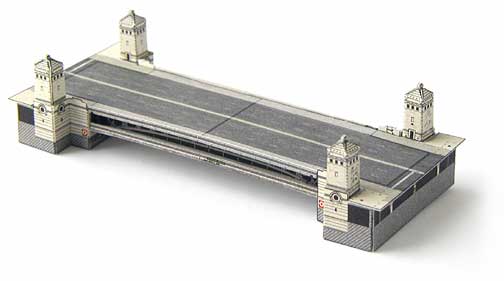
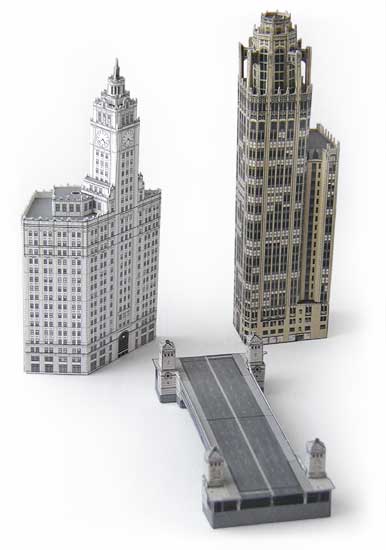
And now your Michigan Avenue Bridge model is complete! Place it next to the Wrigley Building and Tribune Tower, as these are all built to the same scale.

|
 Michigan Avenue Bridge
 Michigan Avenue Bridge